Old Fence Sign
Mr. adventure helped to cut the wood to the size and dimension that I want and attached a small piece of wood to hold everything together.
I created a template in the font that that like.
Then I painted the wood with white acrylic paint.
I love how it looks above my pantry.
Link Parties:
http://www.theshabbycreekcottage.com/2013/08/transformation-thursday-no-219.html
http://knickoftimeinteriors.blogspot.com/2013/08/knick-of-time-tuesday-101.html
http://www.findingfabulousblog.com/2013/08/frugalicious-friday_29.html
http://missmustardseed.com/2013/08/furniture-feature-friday-favorite-link-party/
http://www.fingerprintsonthefridge.com/2013/08/29/feature-yourself-friday-end-of-summer-edition/
http://diyshowoff.com/2013/09/01/that-diy-party-32/
Kitchen Cabinet Makeover
Today I'm sharing our kitchen cabinet makeover, which is one of our most strenuous project to date. I was always wishing for more cabinet space until we decided to paint them. There are A LOT of doors and frames.
Before makeover (please ignore the mess and pay attention to the dated wood color cabinets)
During makeover
We went back and forth between the garage and the kitchen and put 2-3 coats on everything.
After makeover and some organization.
We painted Valspar Kitchen and Bath Primer & Paint in Summer Grey and pasted beadboard wallpaper on the sides. We decided to remove the doors on some of the cabinets to display my flea market finds. We got the knobs from Target on clearance. Scored! The knobs make a huge difference.
The new paint brightens the entire space and gives a fresh new look.It was definitely hard work, but the transformation is stunning. Power of paint! I would love to install a butcher block counter, a new sink and maybe a new stove, but let's leave that for another day :)
Link Parties:
http://www.abowlfulloflemons.net/2013/07/one-project-at-a-time-73013.html
http://somedaycrafts.blogspot.com/2013/07/whatever-goes-wednesday-181.html
http://www.sew-much-ado.com/2013/07/we-did-it-wednesday_30.html
http://www.theshabbycreekcottage.com/2013/07/transformation-thursday-no-215.html
free to fab
i managed to picked up a broken mirror with an extremely ornate frame. i love these kind of frames. makes me giddy.
i removed the mirror and spray painted it grey. added some nice vintage looking fabric from garage sale for $1.
one of the corner is missing the cravings. it bugs me at first, but now I think it adds character.
total cost: $5.5 for a very nice piece in my hallway.
fabric: $1
card board: $1
paint: $3.5


chandeliers with crystal makes me wow
i picked up this free old brass chandelier last year and it's been in my storage since. i know, what a waste. i've been lazy...:P
here's the chandy before
after 4 coats of white spray paint (it's hard to get every single spot)
added some crystal that i got from an estate sale for $3 :) it wowed me. absolutely stunning. can't wait to start decorating my shabby corner(which is actually a formal dining room). the photo doesn’t do justice. I blame the lighting.
linky
coastal charm
wow us wed 25
thriftydecorchick
side table revived
before paint job
during paint job
after paint job
i'm using it as a table to put my makeup containers.
linking to these parties
Between Naps on the Porch {Metamorphosis Monday}
i’m back! entry console table
i’ve been MIA lately. I was busy hanging out with friends during thanksgiving and bringing him around town since it’s his first time in austin. also, it’s too cold do work on any projects. don’t you agree?
anyway, I’ve worked on this console table for a while. just didn’t have time to blog about it. oppss……I forget to take a before picture just imagine it’s ugly rustic wood color that doesn’t go well with anything in my house. after primer and 2 coats of valspar summer grey (loving this color). i need to fill the bottom with some baskets.
I’m so into quatrefoil motif ever since I learned about it. ballard designs has very gorgeous products with quatrefoil motif, but they’re beyond my budget. so, I decided to
make grab a stencil from living livelier and painted my console table with the stencil. it’s hard work. took me a whole afternoon to finish 2 coats of stencil. if you look closely, the painting isn’t perfect with lots of brush strokes and smudges. but I think it adds more charm to it
have a nice week!
pick me up D-table + halloween
saw this broken old D-table by the curb on the way home from work. it looked so sad and lonely. i decided to make a U-turn and jammed it inside my trunk.
before makeover. the leg was wobbly. can’t tell from the photo, but it was there.
i put some nail glue to stabilize the leg. after 1 coat of primer and 2 coats of valspar summer grey paint on the legs. i painted the top with minwax ebony stain. love the end result.
my simple and only fall/halloween decor. i’ll probably get some pumpkins and add more halloween decor on my front yard before the kids come trick-or-treating. oh….i need to get candies and chocolates too.
Spray painted the pumpkin white and the column stand metallic silver. thrifted for $0.50 each :)
have a spooky halloween peeps!!
White dresser
the dresser that i have it’s not going to work for the cottage theme that i’m creating for my bedroom. so, the old dresser is hauled to the guest room and i went hunting on craigslist. found this gorgeous dresser. it’s not in the best shape as it was stored in a shed for a long time. cleaning, sanding and painting will turn this plain dresser to a beauty, don’t you think?
after i aired, cleaned and removed the disgusting and dirty liner (those things are extremely sticky), i’m ready to sand and prime. i just did 1 coat of prime and 3 coats of valspar summer grey (same as my vanity table). Add a coat of polyacrylic to protect it. i was planning to keep the original hardwarre rusty look but, decided to spray them since i will use this dresser often and don’t want my hands to have the rust stench every time i open the dresser. so glad i did.
final product!!
i think my painting skill is slowly improving. the dresser stands handsomely in my room. the mr. was unhappy cos’ we traded a dresser with rails to one without. oh well…..he’ll get use to it.
more photos……
i used fabric & modpodge(didn’t know its existence until i join the decor/craft blogsville wagon) as liner for all the drawers. it was hard work, but well worth it. don’t think i’ll put my clothes in it without liners :P
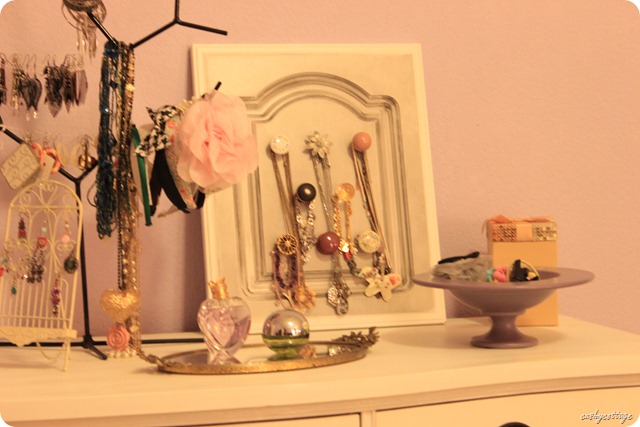
i love the doorknobs accessories holder inspired by madewell clothing store decor. will post about it soon…..
price breakdown:
dresser $30
paint – from another project
spray paint – from another project
fabric $15
modpodge $5.99
total $50.99
quirky photo….i was cooking breakfast and the mr. walked by and saw 2 eggs shells in a spam can. with a sharpie he drew……..pretty creative, huh?

Linky
yucky to yummy chair
was hunting for a chair for my vanity table. i've seen blogger fixing up chairs with new paint, fabric and foam. i’m having lots of fun reading up blogs about DIY projects. trash indeed turns into treasures with some “magic touch.” i’m not a crafty person and certainly can’t sew at all. once i tried to sew a loose button for the mr but ended up poking my fingers several times. the mr sew it himself after seeing those red stains on his pants :P i’m happy to find out sewing is NOT required to reupholster a chair. all i need is a staple gun which i found from one of the estate sales for $4.
picked up this chair from goodwill for $6. it has all the curvy details that i’m looking for. the cushion is stained and dirty, but it will be replaced. I had trouble fitting this chair in my coupe. with a few adjustments, it finally fits in the passenger seat. lol…..i wasn’t planning on hauling furniture when i bought the car. i envy all of you with SUV and trucks.
made a trip to hobby lobby for my supplies. was lucky that they were having sale on fabric and foam. but, i got the wrong size for the foam. mental note…..measure before heading out to the store. no one tells me hobby lobby closes on sunday. blah…..the project was delayed by another week and i’m stuck sitting on a hard wood chair for another week.
finally, after a few coats of krylon white spray paint, tug&pull, stapling and screwing……DONE! (please ignore the messiness).
i have lots of extra fabric. maybe i’ll use it for lamp shade? wall art? it’s going into my drawers for now :p happy tuesday!
Linky

vanity table makeover
